How to Clean White Kitchen Cabinets That Have Yellowed
- Jayant Upadhyay
- Apr 18
- 4 min read

Updated: Jul 9
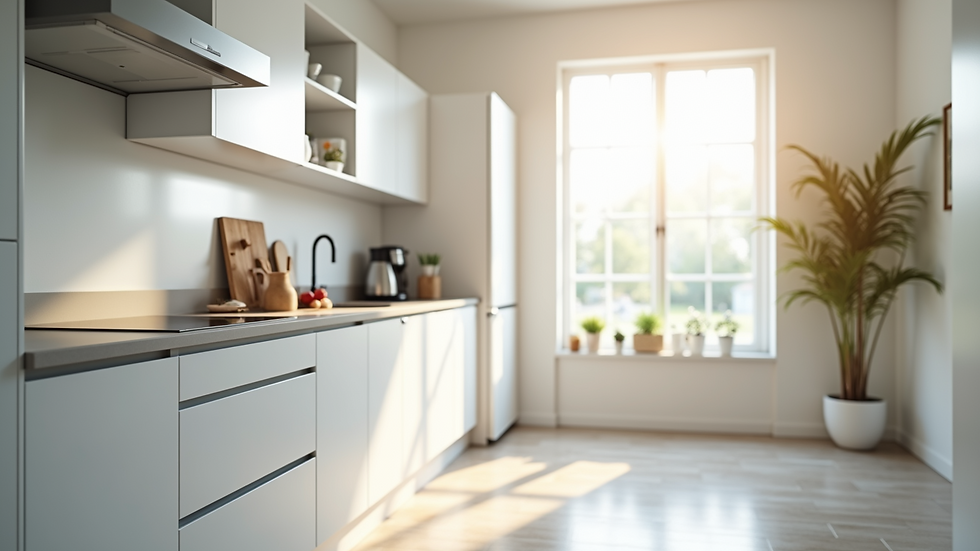
White kitchen cabinets can transform a kitchen into a light and inviting space. However, over time, they may develop an unsightly yellow hue, causing frustration for homeowners. Fortunately, you can restore your cabinets with effective cleaning methods. In this post, we will discuss the reasons behind yellowing, provide detailed cleaning steps, and share useful maintenance tips to keep your cabinets pristine.
Understanding the Causes of Yellowing
To effectively clean and prevent yellowing, it is crucial to understand its causes. Various factors contribute to the discoloration of white kitchen cabinets, including:
Age: Over the years, materials naturally oxidize, which can lead to yellowing. For example, oil-based paints often show signs of yellowing within 5 to 10 years.
Exposure to heat: Kitchens can become hot environments. For instance, cabinets near an oven or stove can yellow faster due to prolonged heat exposure.
Cooking residue: Grease and food particles tend to accumulate on cabinets, especially near the stove. Research indicates that areas near cooking surfaces can show yellowing significantly, necessitating more frequent cleaning.
Smoke and tobacco: Cooking with oils or smoking indoors releases particles that settle on surfaces, leading to yellowing. Smoke can cause noticeable yellow stains, particularly in kitchens without proper ventilation.
Cleaning products: Using harsh cleaners can break down the cabinet's finish and lead to discoloration. Studies have shown that certain chemicals can accelerate the yellowing process.
Understanding these causes will help you tackle the issue and maintain a brighter kitchen.
Preparing for the Cleaning Process
Before cleaning your yellowed cabinets, it’s vital to gather your supplies. Here's a list of items to have on hand:
Dish soap
Baking soda
White vinegar
Warm water
Soft cloths or sponges
Toothbrush (for small crevices)
Protective gloves
Optional: commercial cleaner designed for kitchen cabinets
Once you have these items ready, follow these preparation steps:
Remove all items from the cabinets: Take out all dishes, pantry items, and other belongings to create a clean workspace.
Protect your countertops and floor: Place towels or old sheets down to catch drips or spills during cleaning.
Ensure good ventilation: Open windows or use a fan to improve airflow, especially when using strong cleaning agents.
Put on protective gloves: This will protect your hands when handling cleaners.
You're now prepared to clean your cabinets!
Step-by-Step Guide to Clean Yellowed Cabinets
Step 1: Initial Wipe Down
Start by mixing a solution of warm water and a few drops of dish soap.
Dip a soft cloth or sponge into the soapy water, wring it out, and gently wipe down the cabinet surfaces. This action removes surface dirt and grease contributing to yellowing.
Be cautious not to oversaturate the cloth to avoid water damage.

Step 2: Baking Soda Paste
For tougher yellow stains, create a paste with baking soda and water.
Mix three parts baking soda to one part water to form a thick paste.
Apply the paste directly to the yellowed areas with a soft cloth or sponge and scrub gently in circular motions.
Allow it to sit for about 5 minutes before rinsing away with a damp cloth.
Step 3: Vinegar Solution
If stains persist, try a vinegar solution.
Mix equal parts white vinegar and warm water in a bowl.
Apply the solution on yellowed areas and let it sit for 5 to 10 minutes before wiping it away with a damp cloth.
The acidity of the vinegar effectively breaks down residues, restoring the brightness of your cabinets.

Step 4: Spot Treatment with Toothbrush
For detailed areas or grooves, a toothbrush is an excellent tool.
Dip it into either the vinegar solution or baking soda paste, and gently scrub the areas that are discolored.
This method allows for effective cleaning in detailed spaces without risking damage to the cabinet’s finish.
Step 5: Rinse and Dry
After cleaning, rinse off all cleaning residues thoroughly.
Use a clean, damp cloth to wipe down every surface you cleaned to eliminate any leftover cleaning solution.
Once rinsed, dry all surfaces immediately with a soft, dry cloth to avoid water spots or damage.
Step 6: Apply a Protectant (Optional)
Applying a furniture polish or protectant designed for kitchen cabinets can help prevent future yellowing.
This layer of protection keeps grease and stains at bay and helps maintain that fresh white appearance for a longer duration.
Maintenance Tips for White Kitchen Cabinets
To keep your white kitchen cabinets looking new and minimize yellowing, consider these maintenance tips:
Regular cleaning: Aim to wipe down cabinet surfaces weekly with a mild detergent or vinegar solution.
Avoid harsh chemicals: Use gentle cleaners to avoid damaging the cabinet's finish.
Use a range hood: If you don’t have one, consider investing in a range hood to filter out smoke and grease.
Keep the kitchen well-ventilated: Improved airflow reduces heat and moisture, which can lead to discoloration.
Store items properly: Keep frequently used items away from heat sources to reduce the risk of yellowing.
Incorporating these practices will help you maintain your cabinets' brightness and cleanliness.
Bringing Your Cabinets Back to Life
While yellowing cabinet doors can be frustrating, cleaning them doesn't have to be daunting. By understanding the causes and following this step-by-step guide, restoring the appearance of your cabinets becomes manageable. Regular maintenance is key to preventing future yellowing, so make cleaning a part of your kitchen care routine.
Your efforts will result in a bright and inviting kitchen space you can enjoy for years to come!


Comments